Baked Chicken Thighs: Your New Weeknight Hero
There’s something so wonderfully comforting about Baked Chicken Thighs. They’re the kind of recipe that doesn’t demand fancy ingredients, special skills, or hours in the kitchen—but somehow, the result tastes like you’ve been cooking all day.
I still remember the first time I made them for a last-minute dinner with friends. I opened the fridge, spotted a pack of chicken thighs, and thought, “Alright, let’s keep it simple tonight.” I seasoned them, tossed them in the oven, and 40 minutes later, my kitchen smelled like heaven. The skin was golden and crisp, the meat juicy and tender, and everyone went back for seconds.
That’s the magic of this dish. Baked Chicken Thighs are the ultimate reliable, no-fuss meal. They’re versatile enough for weeknights, yet impressive enough for guests. And the best part? The oven does most of the work while you kick back. 🙌
In this post, I’ll show you exactly how to get crispy skin, juicy meat, and big flavor every single time — even if you’re a beginner.
📝 Ingredients
One of the beauties of this recipe is how short and simple the ingredient list is. Here’s what you need:
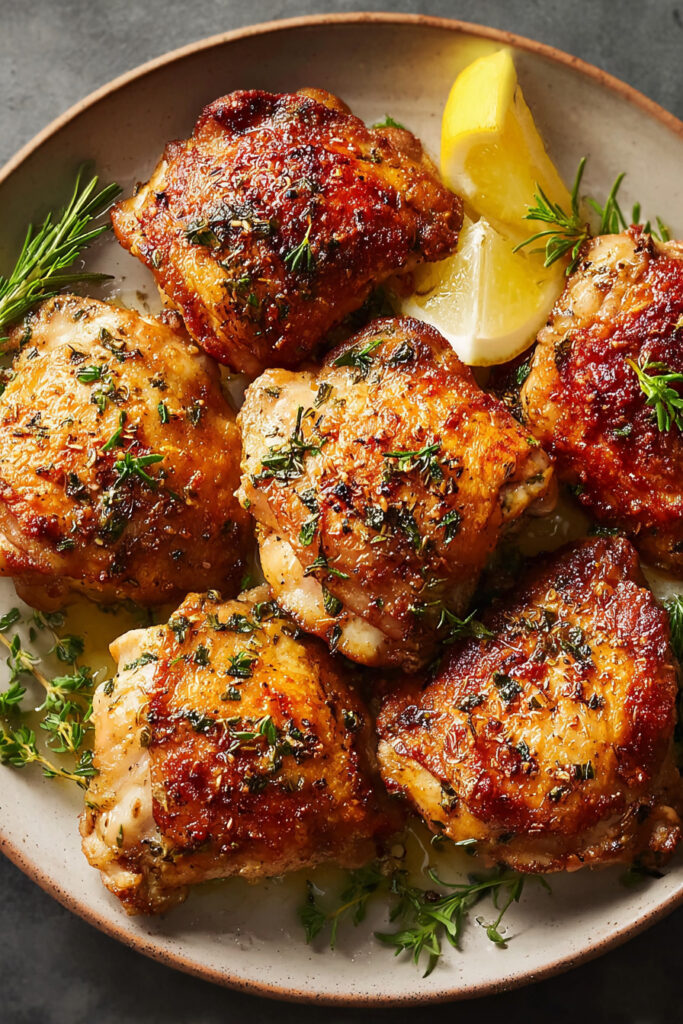
🍗 For the Chicken:
- 4–6 bone-in, skin-on chicken thighs (about 2 ½ pounds)
- 1 tablespoon olive oil or melted butter
- 1 teaspoon kosher salt
- ½ teaspoon black pepper
- 1 teaspoon garlic powder
- 1 teaspoon paprika (sweet or smoked)
- Optional: ½ teaspoon dried thyme or rosemary for extra flavor
🌿 Ingredient Substitutions:
- Chicken: Boneless thighs work too — just reduce the baking time to 25–30 minutes.
- Oil: Avocado oil, ghee, or melted butter are great alternatives.
- Paprika: Swap for chili powder if you want a hint of heat.
- Vegan Option: Replace chicken with extra-firm tofu or seitan thighs, coat them in seasoning, and bake until crisp.
- Gluten-Free: This recipe is naturally gluten-free — no changes needed!
👨🍳 Step-by-Step Instructions
Making Baked Chicken Thighs is incredibly easy. Just follow these steps for golden, juicy perfection:
Step 1: Preheat the Oven
Set your oven to 425°F (220°C). This high temperature is the secret to getting that perfectly crispy skin while keeping the meat juicy.
🔥 Pro Tip: Place your oven rack in the middle position to ensure even cooking and browning.
Step 2: Pat the Chicken Dry
This step might seem minor, but it’s everything when it comes to crispy skin.
Use paper towels to pat the chicken thighs completely dry. Removing excess moisture helps the skin crisp up beautifully in the oven instead of steaming.
Step 3: Season Generously
In a small bowl, mix together salt, pepper, garlic powder, paprika, and any optional herbs. Drizzle the chicken with olive oil, then rub the spice mix all over, making sure to get under the skin too for maximum flavor.
✨ Pro Tip: Don’t be shy with the seasoning — thighs are naturally rich and can handle a bold flavor profile.
Step 4: Arrange on a Baking Sheet
Line a baking sheet with parchment paper or foil for easy cleanup, and set a wire rack on top if you have one. Placing the chicken on a rack allows the hot air to circulate around the thighs, making the skin extra crisp.
If you don’t have a rack, don’t worry — baking directly on the sheet works just fine.
Step 5: Bake Until Golden & Crispy
Pop the chicken in the oven and bake for 35–40 minutes, or until the skin is golden and the internal temperature reaches 165°F (74°C).
The exact time depends on the size of the thighs, but you’ll know they’re ready when the juices run clear and the skin crackles when you tap it.
📝 Optional Finishing Step: For ultra-crispy skin, switch the oven to broil for the last 2–3 minutes. Keep a close eye on it to avoid burning.
Step 6: Rest Before Serving
Once out of the oven, let the chicken thighs rest for 5 minutes before serving. This allows the juices to redistribute, ensuring every bite is juicy and flavorful.
🌟 Extra Tips & Serving Suggestions
🍽 Serving Ideas:
- Pair with a simple green salad and roasted veggies for a balanced dinner.
- Serve with mashed potatoes and gravy for the ultimate comfort meal.
- Slice the chicken and serve over rice bowls, pasta, or inside wraps.
🧊 Storage & Reheating:
- Fridge: Store leftovers in an airtight container for up to 4 days.
- Freezer: Freeze cooled chicken in a freezer-safe bag for up to 2 months.
- Reheat: Bake at 350°F (175°C) for 10–15 minutes, or until heated through. For crispy skin, broil for 1–2 minutes at the end.
🌶 Variations:
- Lemon Herb: Add lemon zest and fresh parsley for a bright, Mediterranean twist.
- Spicy: Mix in cayenne or crushed red pepper for a kick.
- Honey Garlic: Whisk together honey, soy sauce, and minced garlic for a sticky glaze. Brush it on during the last 10 minutes of baking.
🧮 Nutritional Information
(Based on NYT Cooking’s recipe)
Per serving (1 chicken thigh):
- Calories: 250
- Protein: 20g
- Fat: 18g
- Carbs: 0g
- Sodium: 360mg
Nutritional values may vary depending on the exact size of the chicken thighs and ingredients used.
❓ FAQ Section
How long does it take to make Baked Chicken Thighs?
About 45 minutes total, including prep and baking time. The oven does most of the work!
Can I substitute chicken thighs with another cut?
Yes! Boneless thighs work great, just reduce the baking time to about 25–30 minutes. Chicken breasts can be used too, but they cook faster—around 20–25 minutes depending on size.
Can I freeze Baked Chicken Thighs?
Absolutely. Once cooled, freeze in an airtight container for up to 2 months. Reheat in the oven until hot and crisp.
Can I make this recipe ahead of time?
Yes. You can season the chicken up to 24 hours ahead, cover it, and store it in the fridge. When you’re ready to cook, just pop it in the oven.
🥰 Conclusion
There’s a reason Baked Chicken Thighs are a classic: they’re easy, reliable, and seriously delicious. With just a few pantry spices and minimal prep, you get a meal that’s crispy, juicy, and full of flavor every single time.
Whether you’re meal prepping, cooking for family, or just want something satisfying without a lot of fuss, this recipe is a keeper. 🍽✨
If you give it a try, I’d love to hear how it turned out! Drop a comment below, share a photo, or tag me on social media — nothing makes me happier than seeing your kitchen wins. 🙌❤️