Introduction
Fall is here, and you know what that means—apples, caramel, cinnamon, and cozy baking sessions that make your whole house smell like heaven. If pumpkin is the official mascot of fall, then apples are its trusty sidekick, and honestly, I don’t think I could survive the season without them.
Last October, I was planning a cozy movie night at home and wanted something warm, sweet, and a little indulgent without spending hours in the kitchen. That’s when the idea for salted caramel apple crumble bars fall treat: get addicted in 45 min came to life.
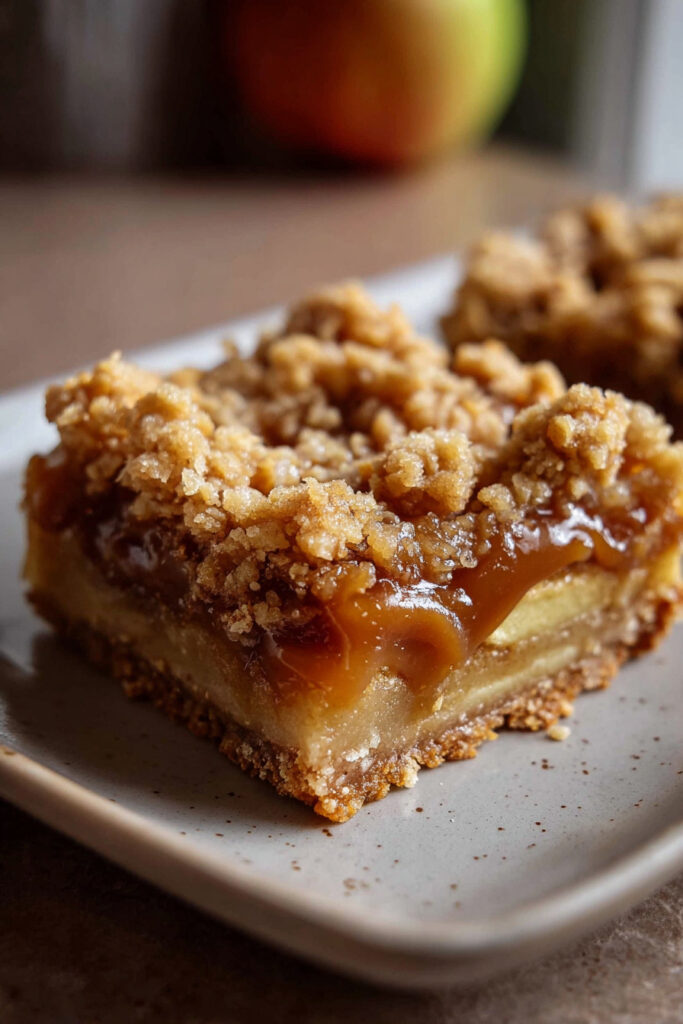
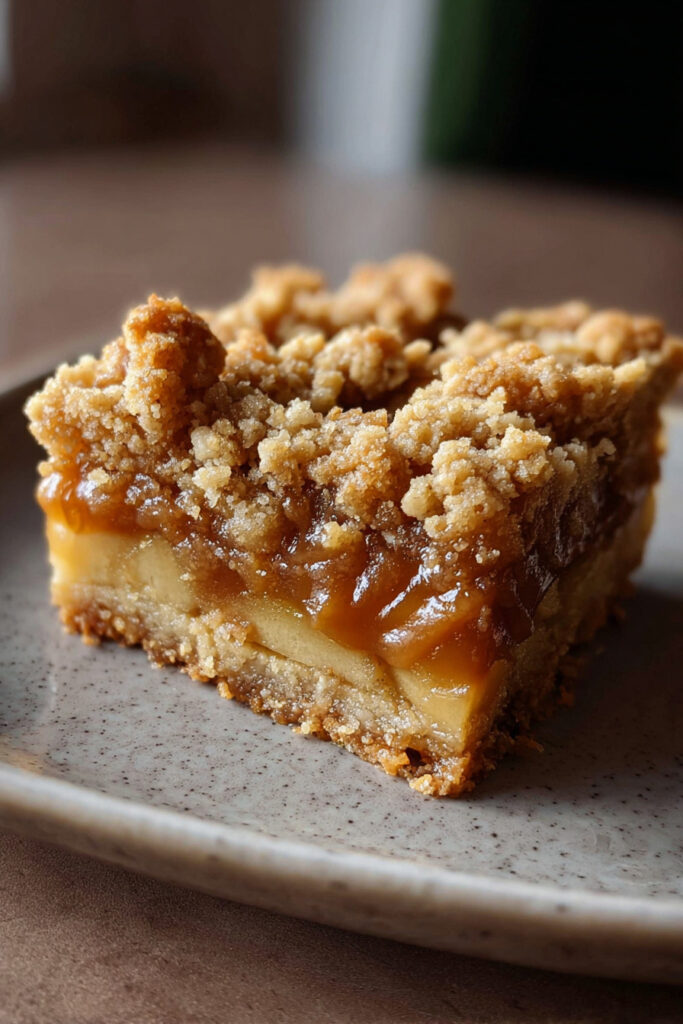
Imagine buttery layers of crumbly shortbread, gooey spiced apple filling, and a drizzle of salted caramel cascading over the top. Each bite is the perfect balance of sweet, salty, and tart. It’s the kind of dessert you can whip up quickly but still feels like a bakery masterpiece.
Whether you’re hosting a dinner party, prepping a fall dessert for Thanksgiving, or just craving a cozy snack with your coffee, these bars check all the boxes. Bonus: they’re portable, freezer-friendly, and a guaranteed crowd-pleaser.
Ingredients
Here’s everything you’ll need to make these irresistible bars:
For the Crust & Crumble:
- 2 ½ cups all-purpose flour
- 1 cup unsalted butter, cold and cubed
- ¾ cup granulated sugar
- ½ teaspoon baking powder
- ¼ teaspoon salt
- 1 teaspoon cinnamon
For the Apple Filling:
- 3 medium apples (Granny Smith or Honeycrisp work best), peeled, cored, and thinly sliced
- 2 tablespoons lemon juice
- ½ cup brown sugar
- 2 teaspoons cinnamon
- ½ teaspoon nutmeg
- 1 tablespoon cornstarch (for thickening)
For the Salted Caramel Sauce:
- ½ cup granulated sugar
- 2 tablespoons unsalted butter
- ¼ cup heavy cream
- ½ teaspoon sea salt
Substitution Ideas
- Gluten-Free: Use a 1:1 gluten-free flour blend in place of all-purpose flour.
- Vegan: Swap butter for vegan margarine, heavy cream for coconut cream, and use vegan caramel sauce.
- Lower Sugar: Reduce the sugar in the crust by ¼ cup and use a sugar-free caramel substitute.
- Apple Swap: Try pears for a fun twist!
Step-by-Step Instructions
Don’t worry, these bars look fancy but are actually super beginner-friendly. Here’s how to whip up this salted caramel apple crumble bars fall treat: get addicted in 45 min recipe:
Step 1: Preheat the Oven
Preheat your oven to 350°F (175°C). Line a 9×13-inch baking dish with parchment paper, leaving some overhang to make lifting the bars out easier.
Step 2: Make the Crust & Crumble
In a large mixing bowl, whisk together flour, sugar, baking powder, salt, and cinnamon. Cut in the cold butter using a pastry cutter or your fingers until the mixture resembles coarse crumbs.
- Reserve 1 ½ cups of this mixture for the topping.
- Press the rest firmly into the bottom of your prepared pan to form the crust.
Step 3: Prepare the Apple Filling
In another bowl, toss the sliced apples with lemon juice, brown sugar, cinnamon, nutmeg, and cornstarch until coated. Spread the apple mixture evenly over the crust.
Step 4: Add the Crumble
Sprinkle the reserved crumble mixture evenly over the apples. Don’t worry if some apples peek through—that’s part of the rustic charm!
Step 5: Bake
Bake for 30–35 minutes, or until the top is golden brown and the apples are tender.
Step 6: Make the Salted Caramel Sauce
While the bars bake, prepare the caramel:
- In a saucepan over medium heat, melt the sugar until it turns amber in color.
- Add butter and whisk until combined.
- Slowly pour in heavy cream (careful—it will bubble up!).
- Stir until smooth, then mix in sea salt.
Set aside to cool slightly.
Step 7: Drizzle and Serve
Once the bars are baked, let them cool for about 10–15 minutes. Drizzle with salted caramel before slicing into squares. Serve warm for ultimate gooeyness or let them set for neater slices.
Extra Tips
✨ Serving Suggestions
- Top with a scoop of vanilla ice cream and extra caramel for an over-the-top dessert.
- Pair with hot apple cider, chai tea, or coffee for a cozy afternoon treat.
- Cut them small for a bite-sized dessert platter at parties.
✨ Storage & Reheating
- Store leftovers in an airtight container at room temperature for up to 2 days, or refrigerate for up to 5 days.
- Reheat in the microwave for 20–30 seconds for that fresh-from-the-oven vibe.
✨ Freezing Instructions
- Freeze cooled bars (without caramel drizzle) in a single layer for up to 2 months.
- Thaw overnight in the fridge, then warm slightly before serving.
✨ Variations to Try
- Nutty Crunch: Add chopped pecans or walnuts to the crumble.
- Spiced Kick: Sprinkle a dash of cardamom or cloves in the apple filling.
- Extra Caramel: Mix caramel directly into the apple filling before baking.
Nutritional Information (per bar, approx. based on 16 servings)
- Calories: 280
- Carbs: 42g
- Sugar: 24g
- Fat: 12g
- Protein: 3g
(Values will vary depending on substitutions and portion sizes.)
FAQ: Salted Caramel Apple Crumble Bars
Q: How long does it take to make these salted caramel apple crumble bars fall treat: get addicted in 45 min?
A: Just about 45 minutes total—10 minutes prep, 30–35 minutes baking.
Q: Can I use store-bought caramel sauce?
A: Absolutely! If you’re short on time, grab your favorite jarred salted caramel and drizzle away.
Q: What kind of apples work best?
A: Tart apples like Granny Smith balance the sweetness, but Honeycrisp, Fuji, or Gala work too.
Q: Can I freeze these bars?
A: Yes! Freeze without caramel drizzle for up to 2 months. Add the caramel after thawing for best results.
Conclusion
There you have it—your new go-to fall dessert: salted caramel apple crumble bars fall treat: get addicted in 45 min. They’re buttery, gooey, sweet, salty, and just the right amount of spiced. Plus, they’re ready in less than an hour, which means you don’t have to wait all day for cozy fall flavors.
I promise, once you try these bars, you’ll want to bake them on repeat all season long. Perfect for family gatherings, holiday tables, or just a cozy night in with a blanket and Netflix, they’re the ultimate autumn indulgence.
Now it’s your turn! Bake these bars, snap a pic, and share them with your friends and family. And don’t forget to leave a comment below—I’d love to hear how much you loved them! 🍎✨🍂